2014-2015 Opinion Stories:
- Melynda's Makeup 101: SPRING MAKEUP ADVICE
by THS Media Editor Melynda Robinson
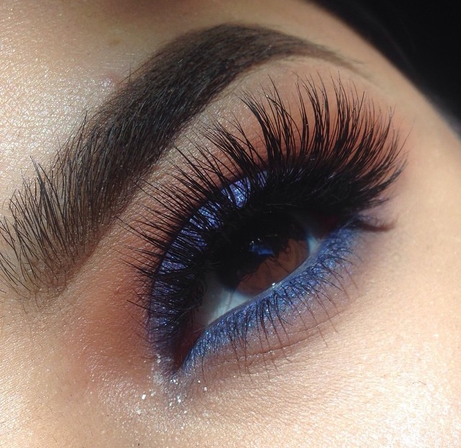 Photo credit for both: instagram.com/mack_lc
When it comes to makeup during the seasons, there isn’t any rules. Getting away from winter for some people means ditching dark colors. While for others, it’s just the beginning. With spring here, bright colors are really starting to surface again. Keep in mind that just because it’s spring doesn’t mean you have to go all colorful. There are subtle ways you can easily include color, to wear it doesn’t look so bold.
For the bright color lovers: This is your season. Keep in mind you don’t need to put a thousand colors on your eyes and then on top of that do a bold lip. You need to keep focus on one thing. If you do a bold eye, then keep the lips simple. If you do a bold lip, keep the eyes simple. Having too much color at one time along with a full face of makeup can really take away from the look you’re trying to achieve. When it comes to color you need to remember that it’s easy to add more but difficult to take away. Colorful eyeshadow palettes:
For the bright color lovers: This is your season. Keep in mind you don’t need to put a thousand colors on your eyes and then on top of that do a bold lip. You need to keep focus on one thing. If you do a bold eye, then keep the lips simple. If you do a bold lip, keep the eyes simple. Having too much color at one time along with a full face of makeup can really take away from the look you’re trying to achieve. When it comes to color you need to remember that it’s easy to add more but difficult to take away. Colorful eyeshadow palettes:
- Urban Decay Vice 3
- Urban Decay Electric Palette
- L.A Girl ‘Neons’
- Urban Decay Shadow Box
- Marc Jacobs Beauty Eyeshadow Palettes
- All Urban Decay Naked Palettes
- Too Faced Chocolate Bar
- The NARSissist Eyeshadow Palette
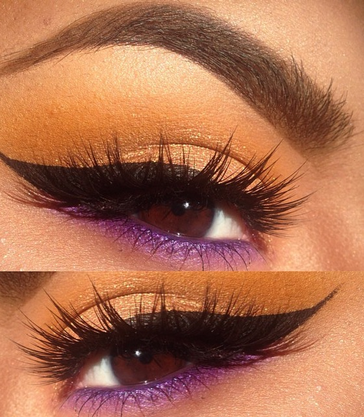 Photo credit for both: instagram.com/mack_lc
For the dark color lovers: Your bottom lash line is essential! I really love incorporating color into the bottom lash line because it’s super simple, but if you do it right it can look gorgeous. Since you normally stick to nudes, blacks, and browns, you want to concentrate those colors on your lid, crease, and brow bone. This is where the color comes in. If you don’t want to do a bright shimmery color on your bottom lash line, you can always go with a matte shade and just smoke it out so it’s not too intense. Here are some palettes I recommend for you:
- Marc Jacobs Beauty Eyeshadow Palettes
- All Urban Decay Naked Palettes
- Too Faced Chocolate Bar
- The NARSissist Eyeshadow Palette
Melynda's Makeup 101: PROM GLAM
by THS Media Editor Melynda Robinson
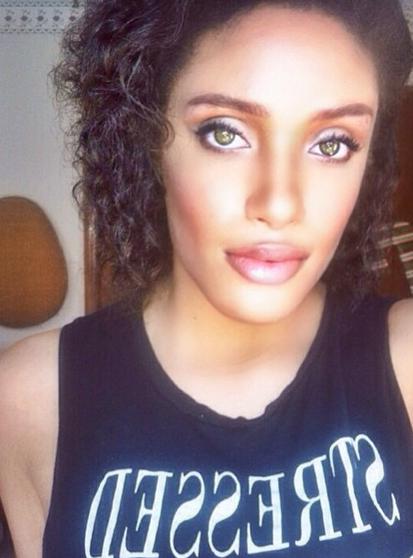 Photo Credit: THS Media Editor Melynda Robinson
It’s said prom is one of the most memorable nights of our life. For this look, I decided to go with a soft glam look inspired by Cinderella. Feel free to substitute any of the colors I do to match your dress!
Skin Prep: Since it’s going to be a long night, you really want to make sure you start out with a fresh base that will last you through the evening. I would start by washing my face, then following up with a face mask. I really recommend any Freeman Face Masks or the Sephora face masks. Both are inexpensive and are really effective. After you are done with your mask, finish with your normal skincare routine.
Skin Prep Part 2: Assuming you used a moisturizer, i’d say wait about 5 minutes before you put any makeup on your face. The 5 minutes provides your top layer of skin time to soak in the product. Using a moisturizer provides a barrier between your skin and the makeup. Also, make sure you wash your hands prior to washing and putting any makeup on your face. After the time is up, it’s time to prime your skin. I’m using Gerard Cosmetics BB Plus Illumination Cream and my Benefit POrefessional. I usually put POrefessional on first and I only put it on my cheek area around my T Zone since my pores are a little bit bigger around there. Since I love a nice healthy glow, I love my illumination cream. I’m not using that much at all since i’ll be using a dewy foundation on top of that. If you like more of a matte finish, you can definitely skip this step and just stick to the primer.
Eyebrows: I always do this step first so again, I can let the product sink in my face. Since my eyebrows are always in caterpillar status, I really don’t have to do that much to them. All I really do is outline them with my Dipbrow Pomade by Anastasia Beverly Hills and fill in any sparse spaces. Then I go in with Milani Clear Brow Gel and just brush the hairs up to keep them in place all day. Every individual does their eyebrows differently. Never forget that, what looks good on someone else, might not look good on you. The best advice I can give you is: 1. Shape your eyebrows in the shape that best suites your face. 2. Follow the natural shape of your eyebrow when you’re filling it in. 3. If you put concealer over/under your eyebrow to shape it, make sure you blend it out really well because no one likes halo brows.
Foundation: This part is totally up to you as to how you apply it. For my choice, i’ll be using Yves Saint Laurent Touche Éclat foundation. This foundation is one of my holy grails because it’s literally dewiness in a bottle. To blend it out, I love using my fingers. I feel like my fingers distribute and diffuse the foundation on my face very well. After I put this on my face, i’m gonna let it set for a little.
Please note you can tone anything I do down.
Contouring and Highlighting: The first thing i’m going to do is my highlight. I’m using LA Girl Pro Concealer in the color ‘Pure Beige’ and putting it on the parts of my face I want to bring forward. This includes: under my eyes (make sure to do this in a triangular shape), my chin, around my lip area (since this area seems to get dark almost on everyone), on my forehead, and down my nose. When trying to find a highlighting concealer, make sure it matches your undertones. If you don’t know your undertone, please see the chart to the left! Also, the highlight should be a couple of shades lighter than your skin tone. Next, i’m going to take my ELF Pro Concealer brush and blend all of this out. After i’m done i’m going to set my concealer with Rimmel Stay Matte Pressed Powder in the shade ‘Sandstorm’. Now it’s time to contour! Again i’m going to start with my LA Girl concealer but this time, i’m using the shade ‘Beautiful Bronze’. I’m going to be putting this right under my cheekbones. If you can’t find your cheekbone, the easiest way to find it is, to do a duckface. You’ll see a line right under where you highlighted, that’s where you contour at. I’m just going to take my Nars Ita Brush and blend this out. Some good dupes for this brush is,the Sonia Kashuk contour brush and the EcoTools Small Fan Brush. If you’re a beginner at contouring, make sure you look straight into the mirror. If you're not used to sculpting your cheekbones and look to the side, nine times out of 10, your cheekbones will end up looking lopsided. I’m also putting a little on my forehead, the sides of my temples, and a little bit under my chin. To set this i’m using the Too Faced Chocolate Soleil Bronzer. An amazing drugstore bronzer is the Sunny NYC Bronzer. Using the powder bronzer, i’m also going to contour my nose. You really want to make sure you thoroughly blend everything out.
Blush and Highlight: My favorite part! Starting with blush i’ll be mixing my 3 favorite Nars blushes- ‘Mata Hari’, ‘Dolce Vita’ and ‘Deepthroat’. Using a stippling brush, i’m going to blend out my contour with this and lightly dusting this on the apples of my cheeks. The reason why you put this on top of the contour is because of the unnatural color. Sadly, none of us naturally has a perfect sharp brown line under our cheekbone. So by doing this, you’re making the contour look more on the natural side. Now it’s time to start looking like a disco ball again! I’m going to be using 2 different powder illuminators for this look. I’m applying this on all areas of the face I highlighted. When I get to my cheekbones, i’m making sure I apply this directly on top and no where else. Taking my Nars Yachiyo brush, I’m applying Mac ‘Soft n Gentle’ first. Then i’m going to go in with my Becca Shimmering Skin Perfector in ‘Opal’ and place it in the same places. When i’m finished blending everything out, i’m just going to go in with my Evian facial mist and lightly spray my face. You can of course use regular water. Doing this just refreshes my face and also makes all the the powders I used look less chalky.
Eyes and Lips: For this look i’ll be using the Too Faced Natural Eye Palette. There are a plethora of drugstore dupes for this palette like the Maybelline The Nudes palette. I’m going to prime my eyelids first using Urban Decay Eye Potion primer in ‘Original’. I’m gonna start with the color ’Heaven ’and place this on my brow bone for my brow highlight. Next i’m going in with the shade ‘Chocolate Martini’ and i’m going to blend this out into my crease with my Mac 216 blending brush. Make sure you blend this into your crease well! For my lid color, i’m using ’Silk Teddy’. Before I put this on my lid, i’m just going to spritz a little of my Mac Fix+ on my brush. This will bring out the shimmer pigment and make the eyeshadow look more metallic. For the lash line, i’m taking the same shade I used for my crease and smoking this out to the lash line with a pencil brush. Be careful with how much you put on your bottom lash line! You can always go back in for more if you put too little on your brush. Remember, it’s easy to add but harder to take away. I’m going to top my eyes off with L'oreal Voluminous Carbon Black mascara and L’oreal Telescopic mascara. You can definitely use eyelashes. For lips, you can really use any color combination. I used Gerard Cosmetics Lipstick and Lipgloss in ‘Nude’.
I really hope you all have a magical prom!
